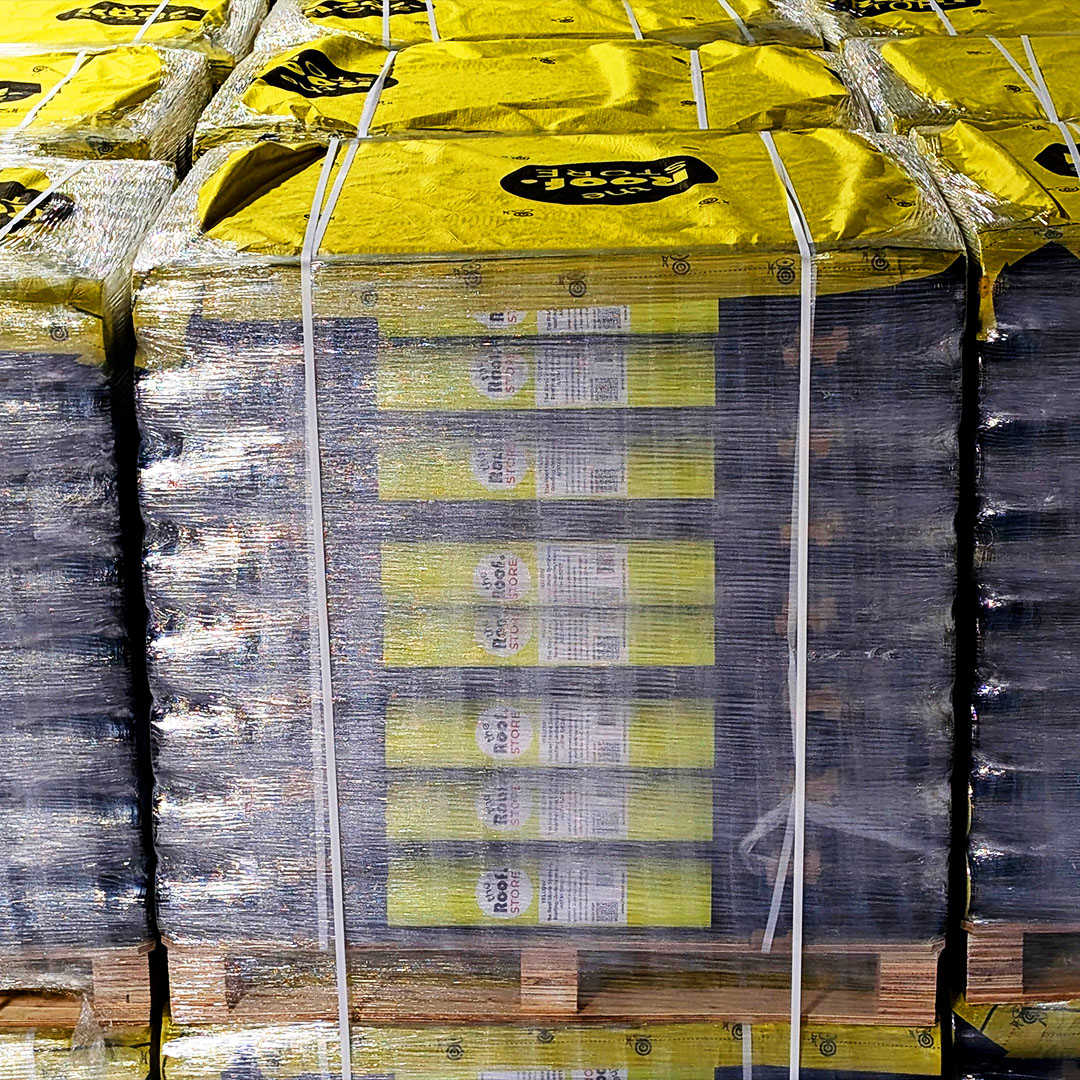
Composite is another way of saying Synthetic Spanish Roof Tiles. 30 pieces per bundle. Composite Spanish Barrel tile roof is 85% lighter than traditional Spanish clay tile roofs. Composite Spanish Barrel Tile will not crack with hail impact. It will also never discolor or wear out anywhere near as fast as other roof systems deteriorate. Class 4 Impact resistant. Direct to Deck or Batten System works well. Lead time is 2 weeks. 13.5 inches Maximum Exposure. Free Shipping does not apply to composite roofing.


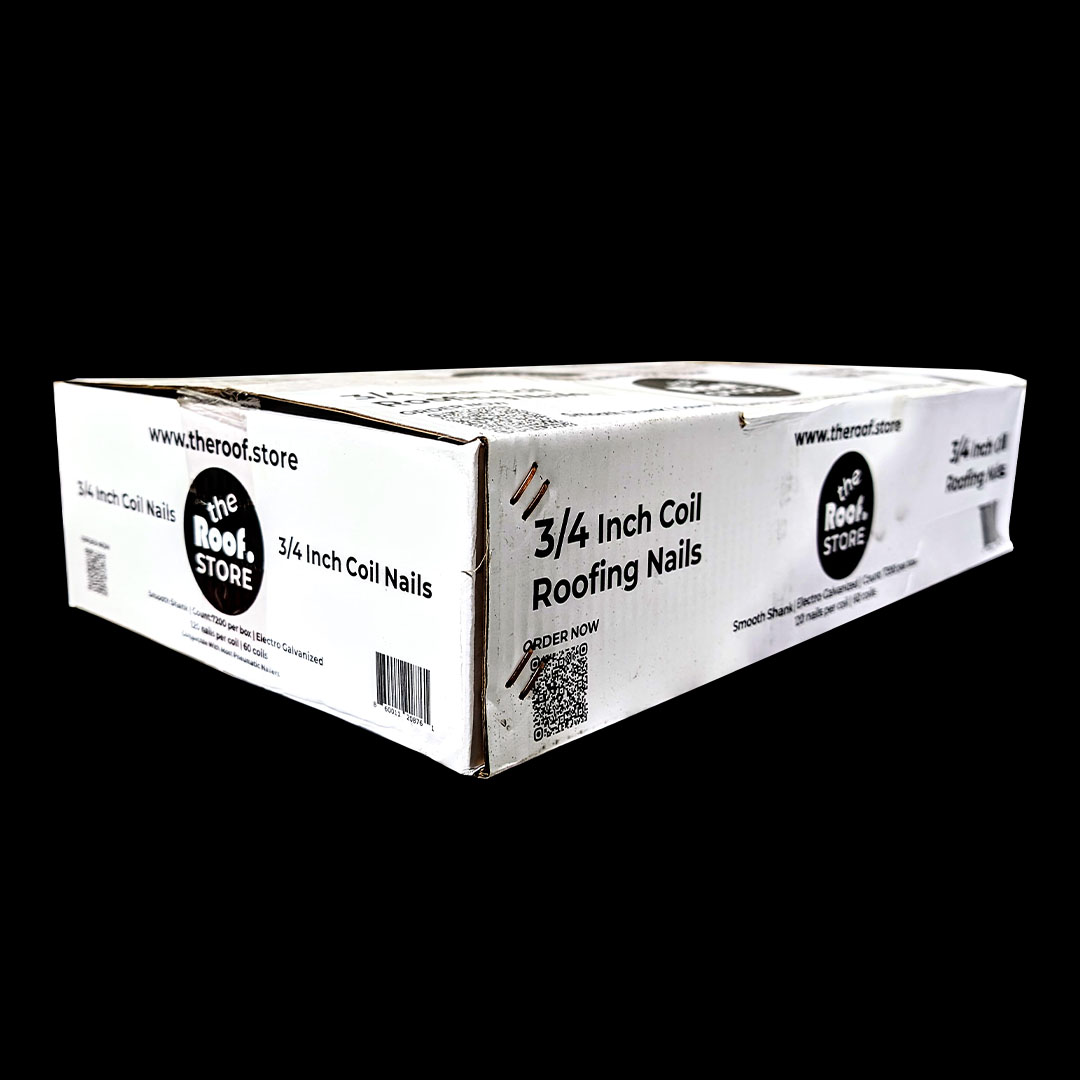
Use screws for maximum wind resistance: Two 2-3/4” (6.98 cm), non-corrosive No. 10 coarse thread, .344”- diameter (8.74 mm) pan-head screws. This will allow for 1/4” (6.35 mm) penetration through sheathing. If using nails: two non-corrosive, 2-3/4” (5.08 cm), 10/11-gauge, ring-shank (18 rings/inch), 3/8”-diameter (9.53 mm) head nails. This will allow for 1/4” (6.35 mm) penetration through sheathing, when using Quarrix tile battens.
There are several components necessary to complete the Composite Spanish Barrel Tile Roofing System.
Our tile has been tested for and installed in every climate zone in North America. The tile’s ability to withstand the hottest summers and the harshest winters, without any freeze/thaw issues, make it a great product in any climate. It is recommended that the actual temperatures at the time of installation be in the 40 to 120 degree Fahrenheit range to ensure proper adhesion of the underlayments, Quarrix Universal Tile Flashing, and other required sealants and adhesives.
In some areas snow guards may be desired to control unexpected snow and ice avalanches from the finished roof. We do not manufacture snow guards, but selections of various metals and designs especially engineered for Quarrix Double Roman Composite Roof Tile can be purchased through Alpine Snow Guards in Morrisville Vermont. Visit Alpinesnowguards.com formore information.
PREPARING THE ROOF DECK FOR INSTALLATION
We recommend the entire Quarrix System Advantage tile component system be installed to provide the best foundational system and long-term protection. Quarrix composite tile can be installed directly to the deck. However, the use of Quarrix DryRoof Roof Battens in the tile component system will provide significant advantages such as reducing installation time and ensuring proper drainage and airflow under the tile. We explain how-to-install Quarrix tile components as well as alternative roofing components in this guide.
All tile and slate roofs are water shedding roofs, and not waterproof roofs like shingles or various membranes. Therefore proper underlayment and specialty flashings are necessary to provide a watertight deck before tile installation. Any roof with a slope less than 4:12, should have a waterproof membrane on the deck, capable of self-sealing around any tile fasteners. It is essential that all previous roofing materials be torn off before starting the Quarrix composite tile installation process.
Wherever sealants or adhesives are called for, be sure to use only those products that are specifically formulated for HDPE (high density polyethylene) as other plastic sealants may not adhere properly. PRE-PLANNING YOUR FLASHING SOLUTIONS Flashing is another critical component to the Quarrix tile component system. Quarrix Universal Tile Flashing is a flexible, expandable, fully self-adhered closure solution that can be used wherever weather blocking or mortar might be required in a conventional tile installation. Quarrix Tile Flashing can be used as a primary flashing, a counter flashing, or in conjunction with specially formed metal flashings. Quarrix does not provide bent metal flashings but details are provided in the Appendix starting on page 24. Flashing can be sourced locally to fit your custom job specifications. Flashing should comply with all applicable local codes.
FASTENERS
Quarrix fasteners offer the best solution for attaching tile or tile trim pieces to the deck. LEVEL OF EXPERTISE NEEDED
We highly recommend that tile roofs be installed by a professional roofing contractor. While it is possible for a well-skilled homeowner to install a small tile roof project by following this guide, larger or more complex roof structures should be installed by a licensed contractor that has tile, slate or high-end roofing product installation experience.
MAINTAINING WARRANTY
The Quarrix composite roof tile warranty offers protection against manufacturing defects found in the tile so as to not rot, split, splinter or suffer structural damage for up to 50 years. Ultimately, roof performance is equally dependent on all materials used and quality of workmanship exhibited during the installation process. Quarrix does not require or provide inspections or certifications of warranty compliance during or upon completion of the installation process. Attention to detail and adherence to the Quarrix Installation Guide, TRI/WSRCA Tile Installation Manual, and commonly accepted roofing practices will ensure a quality installation. For more information or to register a tile warranty, visit Quarrix.com/warranty.
Roof Loading
Generally, the proper loading of a tile roof is significant because of the needed weight distribution of heavier clay or concrete tiles. Quarrix Composite Tiles are significantly lighter, so this is less of a concern. However, the proper placing and mixing of tiles from different pallets and different bundles will expedite the installation process and insure proper blending.
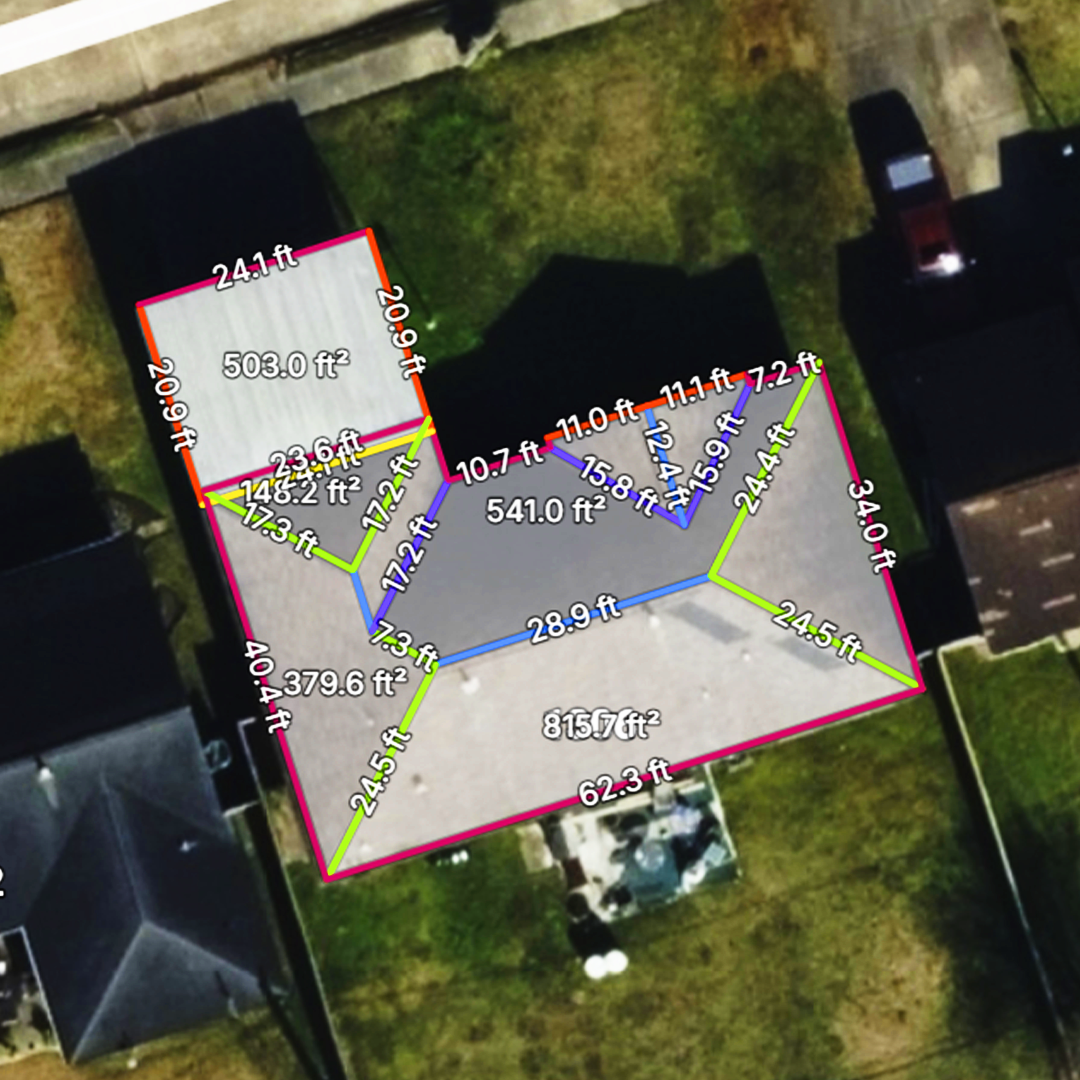
Before loading the roof, check to ensure that all battens, underlayment and flashings are clear of all debris. Also make sure that any holes or damage is repaired. For gable roofs strike vertical lines 58” (1.47 m) O.C. after establishing the starting line approximately 59-3/8” (1.52 m) from the inside edge of the gable fascia. On hip roofs strike the vertical line at the midpoint of the eave to the apex of the hips. Strike vertical lines 58” (1.47 m) O.C. on either side of that center line. Add extra stacks along the hip and valley to allow for one tile per row to be cut on each side. Adjust the starting line to allow for proper rake fit at the gable. Randomly stack tile five high between the chalk lines throughout the roof. Then stack five more tiles randomly on top of the existing stacks to get a good color blend across the entire roof. Stack four to five ridge trim on the ridge, centered on every vertical chalk line. Stack two to three extra tiles on the top stacks if you have an uneven number of rows. The bottom two battens should be kept free of tile stacks. If blending multiple tile colors, order appropriate amount of each color and blend colors randomly on the job site for blended desired final appearance.
Lower Metal Eave Closures
Lower metal eave closures are used to close the opening under the barrels and provide the proper edge for tile at the eaves, flat roof eaves and flat saddles. Place the closure in the closure slot along the bottom underside of each eave tile with the colored side facing the eave. Press the closure down firmly to the bottom of the slot to lock it in place. Closures are designed to be pressure fitted, but if for any reason it does not feel secure, an HDPE sealant (like Geocel 3500), can be used to secure the metal to the tile. Closures are designed for 3/8” (9.53 mm) side overlap and should rest 1/4” (6.35 mm) up from the bottom edge of the eave metal. Lower metal closures sit on the drip edge, they do not overhang it. This will assure a correct roof slope for the first row of tile.
Field Tile Installation
Tile should be installed from right to left as viewed facing the ridge. The right edge of the tile will lock into the left side of the tile laid before. When the tile is laid in a half-joint pattern, every other row lands on the marked vertical line. This sets the course-to-course offset. Install the tile using both fastener holes on every tile. Install the tile using the same exposure determined in the roof layout (never to exceed 13-1/2”). The tile will be more aesthetically pleasing if the break between the tile is offset between courses. In other words, don’t align joints vertically in field tile installation. The tile must be cut to fit at hips and valleys. Tile cuts at rake edges need to be predetermined for fit of the rake cap or the boxed end. Generally speaking, one would work from the rake edge to the cut edge (valley or hip), even if the direction is left to right. The use of Quarrix battens allows the full layout of the horizontal row prior to fastening, for ideal positioning. Installers MUST blend the tile pieces from various pallets and bundles in order to achieve a distinct surface look. Quarrix composite tile is designed to provide a random and varying aesthetic appearance.
Upper Metal Closures & Pan Flashings
Upper metal closures or ridge closures are fastened with the tile fastener. They are used in conjunction with pan flashings, typically on headwall applications, or ridge applications that do not use the Quarrix Universal Tile Flashing or Quarrix Universal Tile Ridge Vent. Position the top row of the tile and bend the closure so the ridge trim and flashing extend past the face of the ridge closure.
Weather Blocking
After the field tile has been installed and all tiles are loosely butted to the hip or ridge nailer, Quarrix Universal Tile Flashing can be used as the weather block (in lieu of mortar). Quarrix Universal Tile Flashing elongates in both irections and is fully adhered. Working from eave to ridge, center the flashing on the hip nailer and begin to form the product to the tile roof surface. You can predetermine how much flashing you want exposed or concealed by the hip/ridge/rake trim piece, and snap vertical lines accordingly for a smooth appearance. Remove the protective strip and press all adhesive firmly to the tiles. When joining rolls of flashing, overlap the already applied rolls by 3” (7.62 cm). Excess material can be cut with a utility knife or sheet metal shears and used in other areas.
Ridge Installation
When all the field tile is installed up to the ridge nailer, Quarrix Universal Tile Flashing, or Quarrix Universal Tile Ridge Vent can be applied to the ridge. Center the flashing or ridge vent on the ridge and loosely form the material to the tile roof surface. You can predetermine how much flashing or vent you want exposed or concealed and snap horizontal lines accordingly. Overlap any rolls by 3”(7.62 cm). Remove the protective strip and firmly press the adhesive into the tiles. Once the flashing or ridge vent is applied, start with the hip starter and then apply the hip and ridge towards the wall or intersecting roof plane.
For a full ridge, apply hip starters on each end and work back to the center. The adjoining center pieces will have to be cut and capped (form a saddle) for a smooth appearance. Ridge pieces should be installed with 13-1/2” exposure (34.29 cm). They should be secured with two fasteners in the overlap area (concealed), or two non-corrosive 3” ring shank nails. Adhesive should be applied on the underside and top edge of the ridge trim to aid in wind resistance. Quarrix does not make trim pieces beyond the basic hip starter. For applications requiring intersections of multiple hips, or ridges and hips, the hip starter can be coped (cut) to rest level on underlying hip/ridge/rake trim tile and Quarrix Universal Tile Flashing can be used to cover joints. Metal flashings can also be fabricated and painted to match for multiple intersections.
Hip Installation
Once the flashing is applied, start with a hip starter on the eave edge and continue with hip/ridge/rake trim. Hip pieces should be installed with 13-1/2” exposure (34.29 cm). They should be secured with two Quarrix fasteners in the overlap area (concealed), or two non-corrosive 3” ring shank nails. Adhesive should be applied on the underside and top edge of the hip trim to aid in wind resistance.
Rake Installation
Hip/ridge/rake tile can be used on rake edges to complete a typical tile aesthetic. It is also possible to box in the rake and simply butt the tile to the rake edge for a different appearance. In either case, the rake trim has to be raised (about 3”), or a wood nailer added to accommodate the thickness of the tile (and battens). The inside corner created on the deck must be flashed either with bent metal as described in the flashings appendix or Quarrix Universal Tile Flashing. This must be part of the initial deck preparation as field tile adjoining the rake are applied row by row as application proceeds from eave to ridge.
The finished appearance of the hip/ridge/rake trim tile will vary significantly depending on where the roof side edge of the hip/ridge/rake trim tile rests on the field tile (high point or low point). Prior to installing tile, it is best to predetermine positioning of the field tile to the rake edge, with hip/ridge/rake trim tile, for the desired effect. It will be necessary to adjust the height of the nailer, cut off the right edge of the field tile, or leave a space between the field tile and the rake to achieve the desired appearance. For example; on a 6:12 slope, a 2x2 nailer, with approximately 3” cut off the right side of the adjoining field tile will position the cap tile to contact the field tile and the outer rake trim equally (see diagram). Slight spaces can be left between the field tile and the rake nailer to accommodate other slopes. Tile is applied right to left, so field tile adjoining the rake on the left side of the gable roof should be cut accordingly to achieve the same appearance. Always pre-check for the best fit.
When using Quarrix Universal Tile Flashing, work from bottom to top, and overlap any rolls by 3” (7.62 cm). Like the bent metal flashings, Quarrix Universal Tile Flashing only needs to lap the nailer or wooden rake trim about 1” (to the outside) and should not be visible when hip/ ridge/rake trim pieces are applied.
Once all the field tile and Quarrix flashing is installed, the hip/ridge/rake tile can be applied to the rake. The first tile at the eave edge can either be a hip starter or a regular hip/ridge/rake tile depending on aesthetic preference. Cut the top of first hip/ridge/rake trim tile (or hip starter tile) so it is flush with the nose of the field tile. Butt successive hip/ridge/rake tile to the nose of each field tile. This will not match the exact field tile exposure up the rake, but it will result in the best cap fit to both the outside rake and the field tile. It is possible to match the exact exposure with other configurations, but large gaps between the caps and the field tile will have to be tolerated or packed with a roof mortar. Hip/ ridge/rake tile should be secured with two Quarrix fasteners, or non-corrosive 3” ring shank nails, in the head lap area (concealed), to the rake nailer. Adhesive should be applied on the underside and top edge of the ridge trim to aid in wind resistance. If additional exposed fasteners are used on the outside rake, they should be caulked with a matching sealant. NOTE: If rain gutters are desired on your roof, they can be installed prior to, or after tile installation. It is recommended that gutters be at least 6” wide to accommodate the rain dispersion created by the double roman profilHigh Wind Installations:
Please contact Quarrix for information on installation methods for high-wind areas. You may also contact Quarrix to request any potential amendment to Quarrix’s Limited Warranty related to wind speeds. Quarrix will review each request on a case-by-case basis and any amendment will be made at Quarrix’s sole discretion. No person or entity is authorized by Quarrix to make, and Quarrix shall not be bound by, any statement or representation as to the performance of Quarrix Products other than what is contained in its Limited Warranty. No warranty shall be amended or altered except in a written instrument signed by Quarrix and Owner.
General Maintenance After Installation:
Algae/Moss
In some regions, the development of algae and moss can occur on any building material; the growth of moss or algae form on the dirt and moisture on the surface of the tile. Tile can easily be cleaned with water pressure, brushes and commercial roof cleaners. Leaves and Other Debris Keep tile free of all debris to help prevent any roof problems from arising, like water backup from damming in sensitive areas (valleys, skylights, penetrations, etc).
Manufacturer Address: Quarrix 5600 N Highway 169 New Hope, MN 55428
Components:

Universal Tile Ridge Vent - Black 38.1 cm x 7.62 m
Universal Tile Ridge Vent - Terra Cotta 40 cm x 4.87 m
Universal Tile Ridge Vent - Venetian Red 40 cm x 4.87 m
Universal Tile Ridge Vent - Brown 40 cm x 4.87 m


Replacing a Broken Tile Piece
Locate the broken tile piece, raise the butt end of the tile to the left of the broken one and insert a wedge to hold it up out of the way. Next, raise the butt end of the tile above to the right, and insert another wedge. If the broken tile was nailed, slide the flat bar between the tile and the deck/batten twisting it to loosen the nails. If the broken tile was screwed, break the water dam off at the top of the tile and cut through the fastener collar and screw with a hacksaw. Lift the broken tile up and to the right to remove. Apply a generous amount of construction adhesive to the underside of the new tile piece at the base of the lugs and on the top inch of the water lock. Slide the new tile up and to the left to interlock it with the one on each side. Remove the two wedges to complete replacing broken piece.
QUARRIX BUILDING PRODUCTS (“QUARRIX”), WARRANTS TO THE OWNER OF THE BUILDING AT THE TIME Composite Roof Tile (“Quarrix Products”) WERE ORIGINALLY INSTALLED (“Owner”), ONLY THAT the Quarrix Products will be free from manufacturing defects so as to not rot, split, splinter or suffer structural damage from normal weather conditions and termite or fungal decay when subject to normal use for a period of fifty (50) years from the date of original purchase or will not blow off or otherwise become damaged by winds less than eighty (80) miles per hour for a period of ten (10) years from the date of original purchase.
QUARRIX’S LIABILITY UNDER THIS WARRANTY IS LIMITED SOLELY TO REPLACEMENT OF DEFECTIVE QUARRIX PRODUCTS. OR, AT QUARRIX’S OPTION, REFUND OF ORIGINAL PURCHASE PRICE OR REASONABLE REPLACEMENT COST (as defined hereinafter).
Owner’s sole and exclusive remedy for any claim whatsoever, whether in contract, warranty, tort, strict liability, or otherwise arising out of the use, storage or possession of Quarrix Products, including without limitation any claim that Quarrix Products failed to perform as warranted, shall be replacement with substitute Quarrix Products or refund of the original purchase price. To obtain replacement or refund, the Owner must have returned a copy of this certificate within thirty (30) days of installation and must submit a claim within thirty (30) days of the discovered defect together with this warranty certificate, the original purchase invoice indicating the date of purchase, pictures, a sample of the defective Quarrix Products, and a detailed description of the defect to Quarrix for settlement at Quarrix Building Products, 705 Pennsylvania Ave. S, Minneapolis, MN 55426.
THIS WARRANTY SHALL NOT APPLY TO QUARRIX PRODUCTS THAT HAVE NOT BEEN INSTALLED IN ACCORDANCE WITH MANUFACTURER’S GUIDELINES AND ALL APPLICABLE BUILDING OR SAFETY CODES OR HAVE NOT BEEN PAID IN FULL.
This warranty does not provide protection against any failure, defect or damage caused by situations and events beyond Quarrix’s control, including but not limited to: (i) natural disasters, hail over 1.0” in diameter, fire, smoke, chemicals, earthquakes, lightning or static electricity, (ii) falling, thrown or blown objects, (iii) the neglect, abuse, misuse (including faulty installation, repair or maintenance), improper transportation, handling or storage of the Quarrix Products or other failure to comply with the instructions set forth in the documentation and/or manual accompanying the Quarrix Products, (iv) a modification of the Quarrix Products not provided by Quarrix, (v) a malfunction of any product not provided by Quarrix with which the Quarrix Products are used or combined, (vi) use, modification or other treatment of the Quarrix Products in a manner for which it was not designed or intended, (vii) defects or damage due to inferior building practices, ventilation, drainage issues or roof slopes inconsistent with snow and ice control, (viii) replacement under or subjection to abnormal use conditions, (ix) normal wear and tear including the natural effects of progressive aging on the color and surface of the tile, (x) discoloration and variations in color or uniformity caused by weathering and/or UV exposure, staining due to shade or sap, ash or proximity to metals that might cause discoloration; (xi) foot traffic, (xii) vandalism or other malicious actions, or (xiii) Quarrix Products blown off by winds in excess of 80 mph. This warranty does not cover product defects on installed roofs where such defects were apparent at or prior to installation.
After ten (10) years from the original purchase date, however, if Quarrix chooses to pay Reasonable Replacement Cost of the affected products, the amount Quarrix may pay will be reduced by the amount of usage the Owner has received of affected products. Thus, Quarrix will pay a percentage of the Original Purchase Price of the affected products. The percentage will be determined by dividing the number of months remaining in the warranty by 600 (the number of months in the original warranty period). This percentage will be multiplied times the ORIGINAL PURCHASE PRICE for the affected product. NOTE: Reasonable Replacement Costs covered by this Limited Warranty do not include costs to tear-off, dump fees, flashing, metal work, underlayment related work or related materials, or any labor associated with any replacement.
QUARRIX’S WARRANTY SHALL APPLY ONLY TO THE QUARRIX PRODUCTS. IN NO EVENT SHALL QUARRIX BE LIABLE FOR TRANSPORTATION, LABOR OR OTHER EXPENSES INCURRED BY THE OWNER, OR SPECIAL, INCIDENTAL, EXEMPLARY OR CONSEQUENTIAL DAMAGES OF ANY KIND WHATSOEVER, WHETHER BASED UPON WARRANTY, CONTRACT, TORT, STRICT LIABILITY OR OTHERWISE. QUARRIX’S LIABILITY ARISING OUT OF THE MANUFACTURE, SALE OR SUPPLY OF THE QUARRIX PRODUCTS OR THEIR USE SHALL NOT EXCEED THE ACTUAL PURCHASE PRICE. THIS WARRANTY MAY BE TRANSFERRED ONE TIME TO NEW OWNER OF THE STRUCTURE WITHIN SEVEN (7) YEARS OF THE DATE OF ORIGINAL INSTALLATION.
To do so, the original Owner must send a certified letter requesting the transfer, along with a photocopy of the original warranty or purchase contract, and provide the name, address and purchase date of the new Owner to Quarrix Building Products, 705 Pennsylvania Ave. S, Minneapolis, MN 55426, who will return a warranty to the new Owner.
OWNER IS SOLELY RESPONSIBLE FOR DETERMINING THE SUITABILITY OF USE OR APPLICATION OF ANY QUARRIX PRODUCT, OR WHETHER QUARRIX PRODUCTS MEET REQUIREMENTS OF APPLICABLE BUILDING CODES OR SAFETY CODES FOR SPECIFIC APPLICATIONS.
No person or entity is authorized by Quarrix to make, and Quarrix shall not be bound by, any statement or representation as to the performance of Quarrix Products other than what is contained in this warranty. This warranty shall not be amended or altered except in a written instrument signed by Quarrix and Owner.
THE FOREGOING WARRANTY IS EXCLUSIVE AND IN LIEU OF ANY OTHER WARRANTIES WITH RESPECT TO QUARRIX PRODUCTS, WHETHER ORAL OR WRITTEN, EXPRESS OR IMPLIED, INCLUDING WITHOUT LIMITATION, ANY IMPLIED WARRANTY OF MERCHANTABILITY, FITNESS FOR A PARTICULAR PURPOSE OR NON-INFRINGEMENT.
Laws from time to time in force in certain jurisdictions may imply warranties that cannot be excluded or can only be excluded to a limited extent. This warranty shall be read and constructed subject to any such statutory provisions. This warranty gives you specific legal rights. You may have other rights, which vary from state to state.